Estimated time: 5-10 minutes. You will need access to your Guardrails dashboard and Clarion workspace.
The Clarion integration wizard generates the webhook URL and signing secret for you. Keep the wizard open alongside your Guardrails dashboard.
Prerequisites
- Access to your Guardrails dashboard with permissions to create Response Channels
- A Clarion workspace with the Guardrails integration wizard open
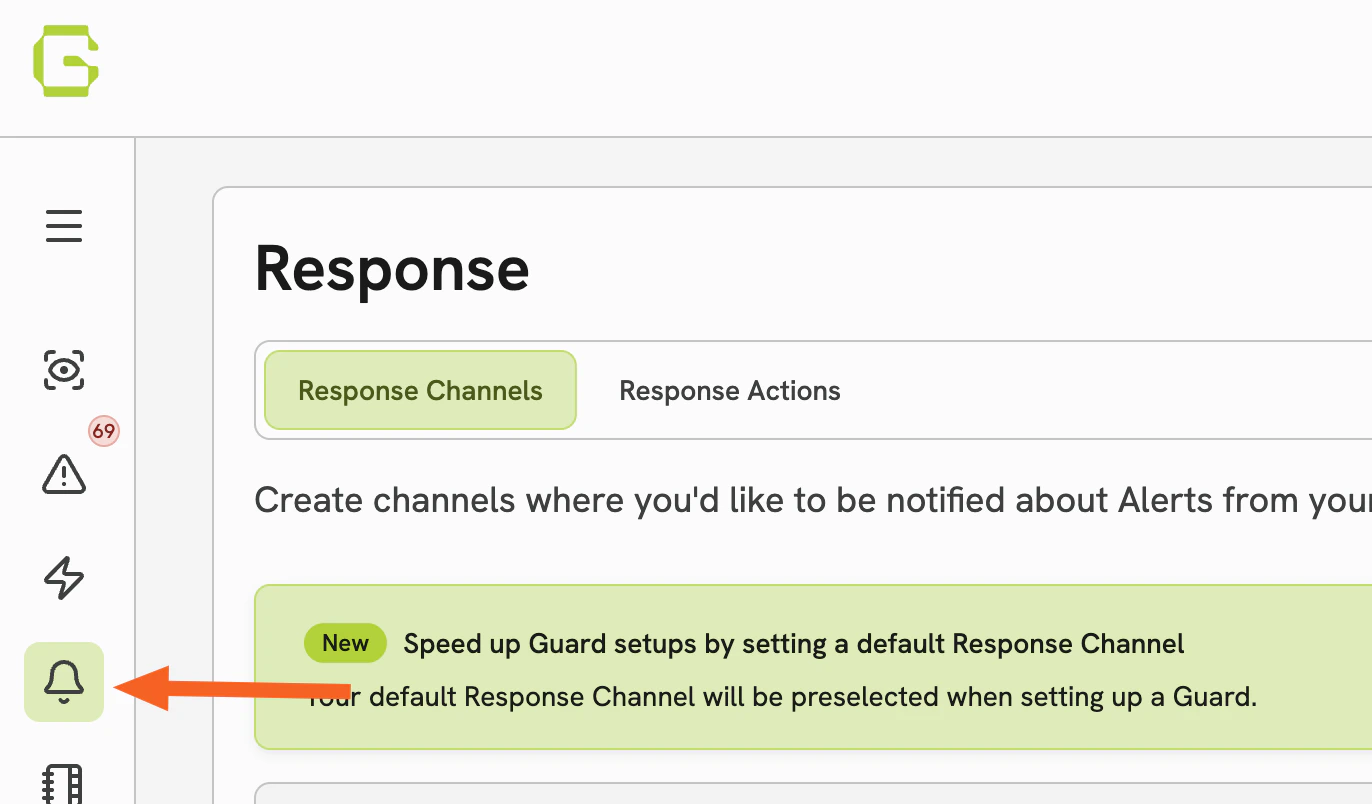
Part 1: Create the Webhook Response Channel in Guardrails
Step 1 — Open the Responses menu
- Log in to your Guardrails dashboard
- Open the Responses menu and click Create new response channel
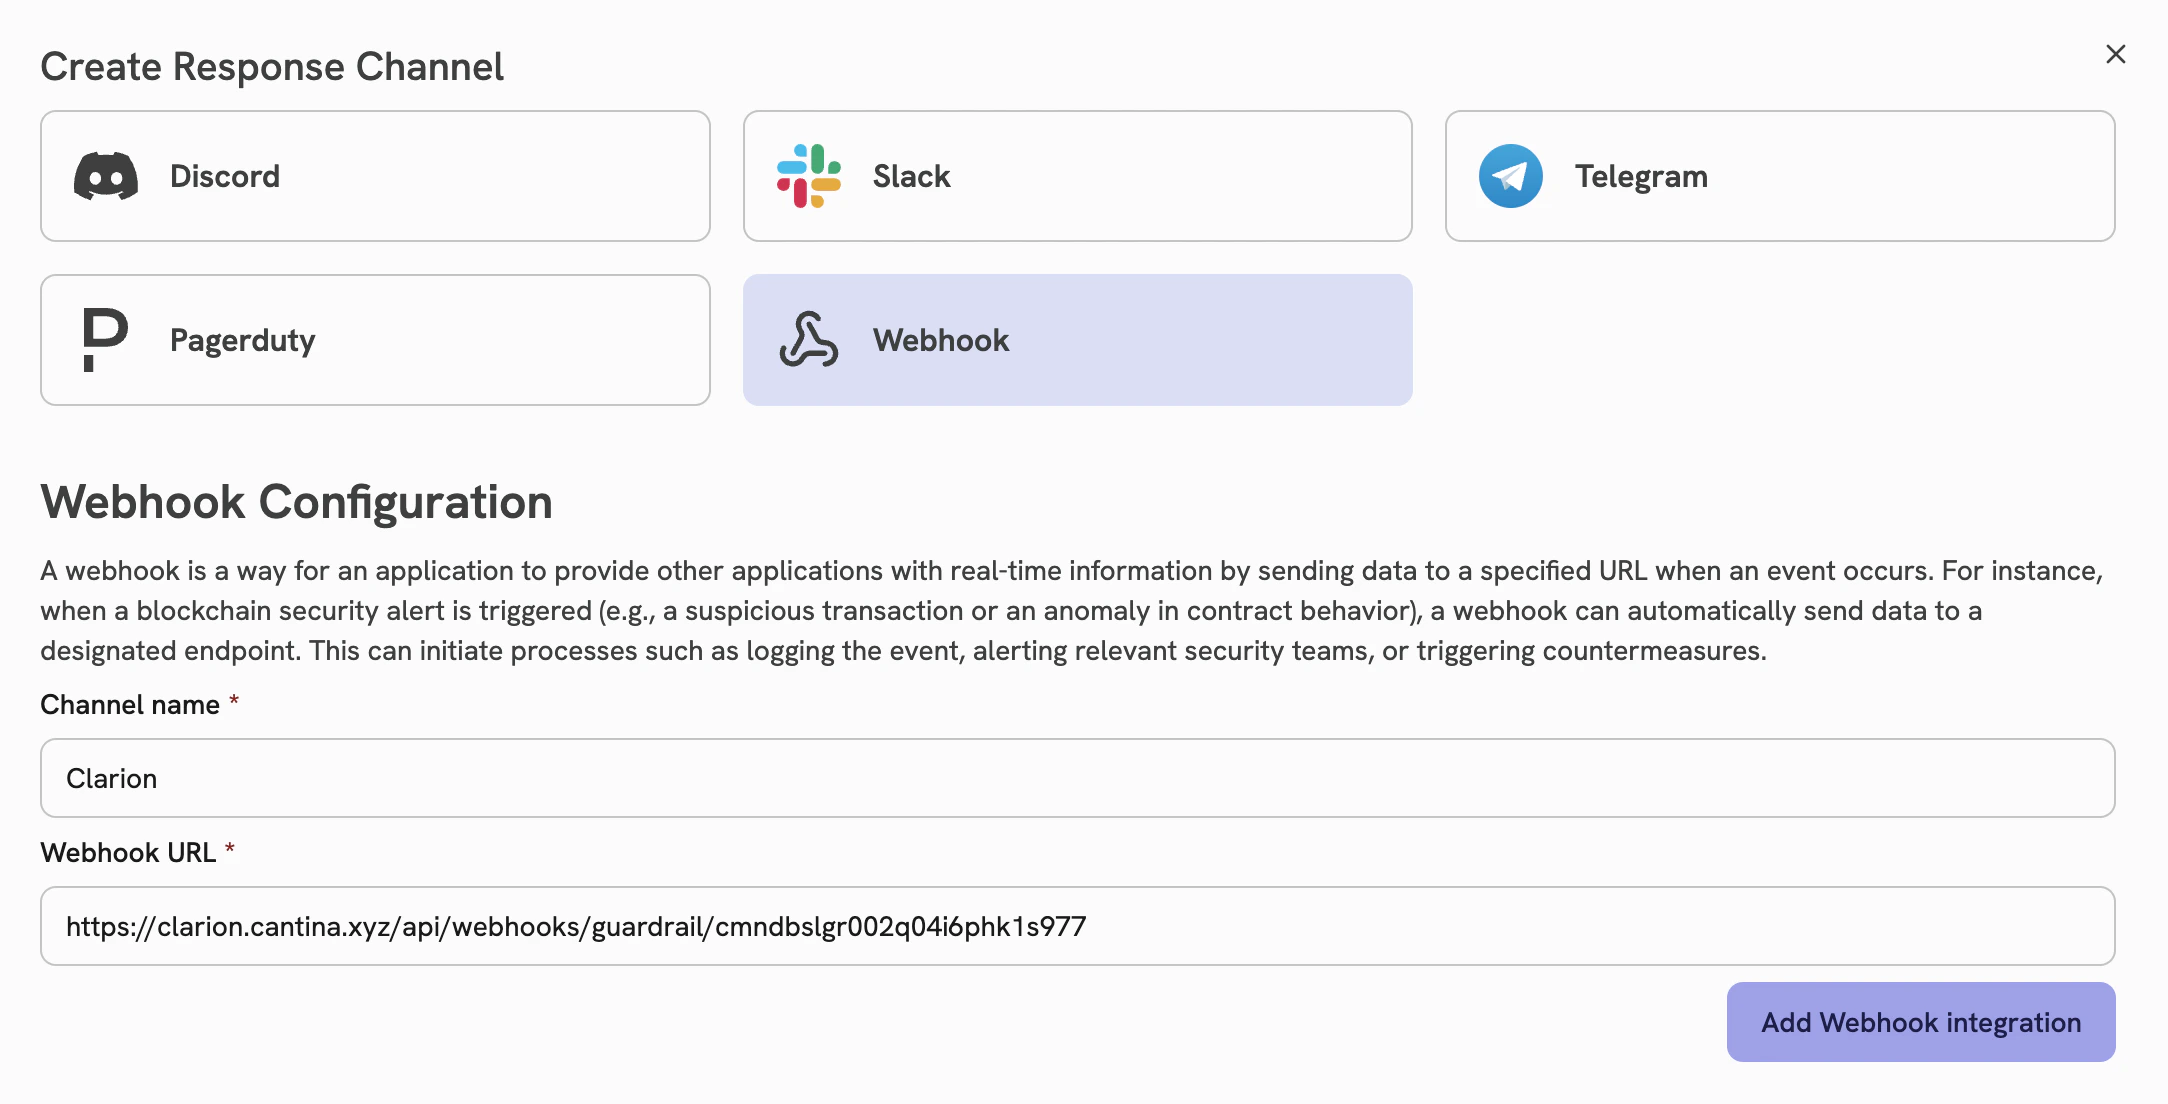
Step 2 — Select Webhook as the channel type
- Under Create response channel, select Webhook as the channel type
Part 2: Configure the Webhook in Clarion
Step 3 — Create a new monitor in Clarion
- In Clarion, go to Integrations
- Navigate to Guardrails and click Create a new monitor
Step 4 — Connect the webhook URL
- Copy the Webhook URL generated by the Clarion integration wizard
- In Guardrails, paste this URL into the webhook configuration for your new Response Channel
- Click Add webhook integration
Step 5 — Add the signing secret
- In Guardrails, copy the Signing Secret displayed after adding the webhook
- In Clarion, paste this value into the HMAC Key field
Step 6 — Finish creating the Response Channel
- Complete the remaining fields and save the Response Channel in Guardrails
Part 3: Assign the Response Channel to Your Guards
Step 7 — Assign to Guards
- Once the Response Channel is created, click Assign to Guards
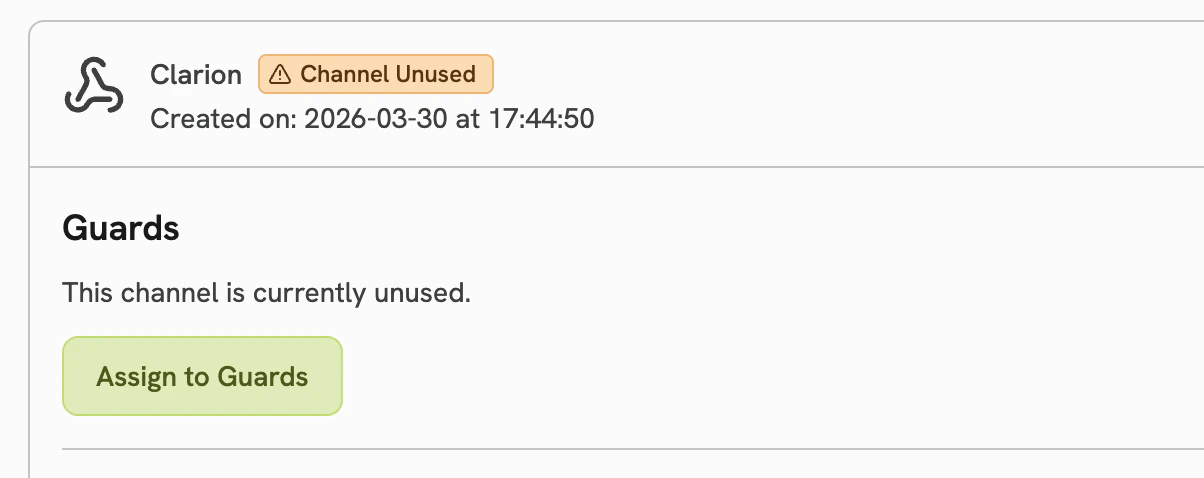
- From the list, select the Guards you want to send alerts to Clarion for
What happens next
Once configured, Clarion will automatically:- Receive alerts from Guardrails in real time via the webhook
- Analyze and triage incoming Guard events using AI agents
- Surface actionable insights and recommended responses